Insulating the floor of your garden room could be a great way to keep the room warm in the depths of winter and cool when the heat of the summer arrives, it can also help prevent draughts and reduce your energy costs.
The majority of garden rooms in the UK are built upon a concrete base or foundation. The floor finishing may be laid directly onto this with insulation in between, or a wooden floor that rests upon joists may be fitted, this is known as a suspended floor.
Planning ahead
The type of insulation you use may depend upon whether construction of your garden room has actually started or if you are insulating the floor of an existing building.
The easiest and most cost effective way to insulate a garden room floor is during the early stages of construction when the concrete base is being laid, retro fitting of insulation can involve removing existing flooring and possible issues with the extra layers adding floor height, this can all be avoided when building a new garden room.
Insulating under a garden room concrete floor
Insulating below a concrete floor is the most effective form of insulation for a garden room, unless you are prepared to excavate the existing floor for retro fitting of the insulation it is always best done when the concrete base or foundation is being laid.
Generally, when insulating below a concrete base, a layer of sand is laid over the levelled surface, this is to protect the damp proof membrane (DPM) which is to be laid over the sand. The damp proof membrane is important as it will protect against damp, which may cause the insulation to become ineffective. The insulation is laid on top of the damp proof membrane, after which the concrete is laid. The exposed edges of the concrete base, the damp proof membrane and the insulation can be protected from the elements by a cladding of your choice. The floor finishing can be either laid directly onto the concrete base, or onto a layer of sand and cement screed.
Insulating over a garden room concrete floor
It is not always possible to fit insulation beneath the concrete floor of a garden room; you may not wish to go through all the upheaval and expense of having to remove your existing concrete floor, then adding insulation and a damp proof membrane before laying a new concrete floor. Fitting insulation on top of your concrete floor is a much simpler and cost effective alternative.
The method of fitting insulation above the concrete floor of a garden room is very similar to fitting it beneath the concrete floor. The damp proof membrane layer is laid directly onto the concrete and the layer of insulation is laid on top of it, a layer of sand and cement screed is then laid (or a layer of chipboard if preferred) and the finishing flooring is fitted on top. It is important to take into account the fact that the floor height is likely to be impacted by the addition of these extra layers, you may need to adjust the size of doors, trim architraves and reposition skirting boards. Always use a fully qualified electrician if it becomes necessary to change the position of electric sockets.
Fitting a garden room floating floor
A popular way of insulating a garden room floor is to lay a floating floor; this method can be carried out on a DIY basis by a competent DIYer. A floating floor consists of a layer of insulation boards laid tightly against each other right across the room; the second layer is a damp proof membrane and this is laid across the insulation boards, the top layer of a floating floor is chipboard – the tongue and groove type. Skirting boards and architraves should be removed before laying your garden room floating floor, once finished they can be refitted and will assist in anchoring the floor. Doors may need to be trimmed due to the added floor height. As mentioned before – always use a fully qualified electrician if it becomes necessary to change the position of electric sockets.
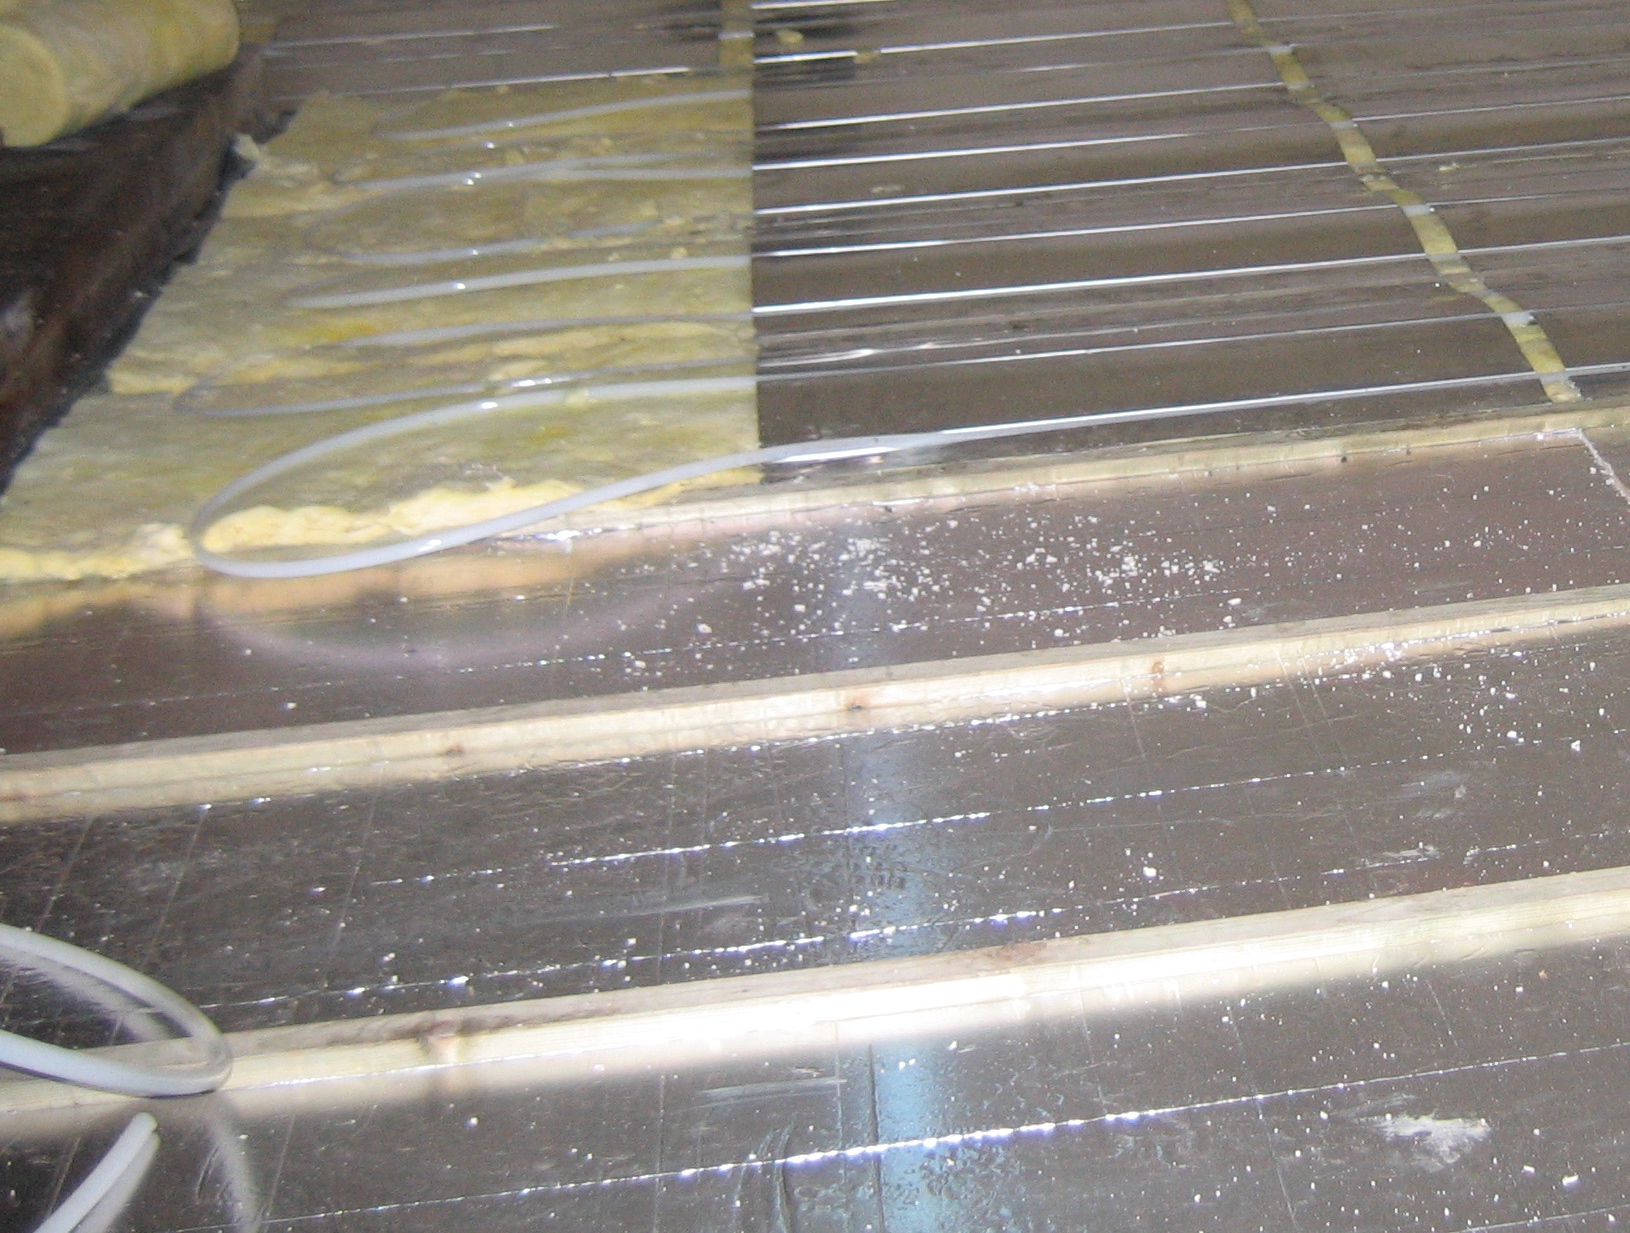
Insulating a garden room suspended floor
If your garden room floor consists of wooden floorboards sitting upon joists then you have a suspended floor, unfortunately a garden room is unlikely to have a cellar, basement or crawlspace so it will be necessary to lift your floorboards in order to install insulation. The insulation is fitted into the area between the joists and this will help to prevent draughts and heat loss. Netting or chicken wire can be fitted to hold your choice of insulation in place under the floorboards. Insulation materials suitable for a garden room suspended floor include PIR (Polyisocyanurate) thermal insulation board, mineral wool and sheep’s wool. It is imperative that you should not cover any ventilation grills, also known as airbricks, as without the ventilation provided by these ventilation grills your floorboards are very likely to begin to rot!
Types of garden room floor insulation
Expanded Polystyrene insulation, also known as EPS, is made of beads of foam which have been exposed to heat causing them to bond together. It is sold in sheet form.
Extruded Polystyrene insulation, also known as XPS, is made using an extrusion process; it is denser than EPS and also more expensive.
Polyisocyanurate (PIR) boards are a rigid board made from a foam material. PIR boards can be bonded to plywood, OSB board and plasterboard. They can also be sandwiched between two aluminium foil facings and used for concrete floor insulation.
Mineral wool, glass wool and sheep’s wool are just a few of the types of insulation made from natural materials; they are available in rolls and insulation slabs – also known as insulation batts.
Insulating your garden room floor will not only make the room a more comfortable place for you and your family to use, it will also help to reduce noise transference and save you money on your heating and cooling costs.
Special thanks Bryn Pinzgauer for providing the image
1 thought on “Garden Room Floor Insulation”